Trusted by 165+ Homeowners
Ceiling Drywall Water Damage Restoration in Watkinsville, GA
- Over 165 5-Star Reviews
- Free Estimates and Quotes
- 100% Satisfaction Guaranteed
- Child, Family & Pet Safe Steps
- 24-Hour Emergency Service
- Fully Licensed & Insured

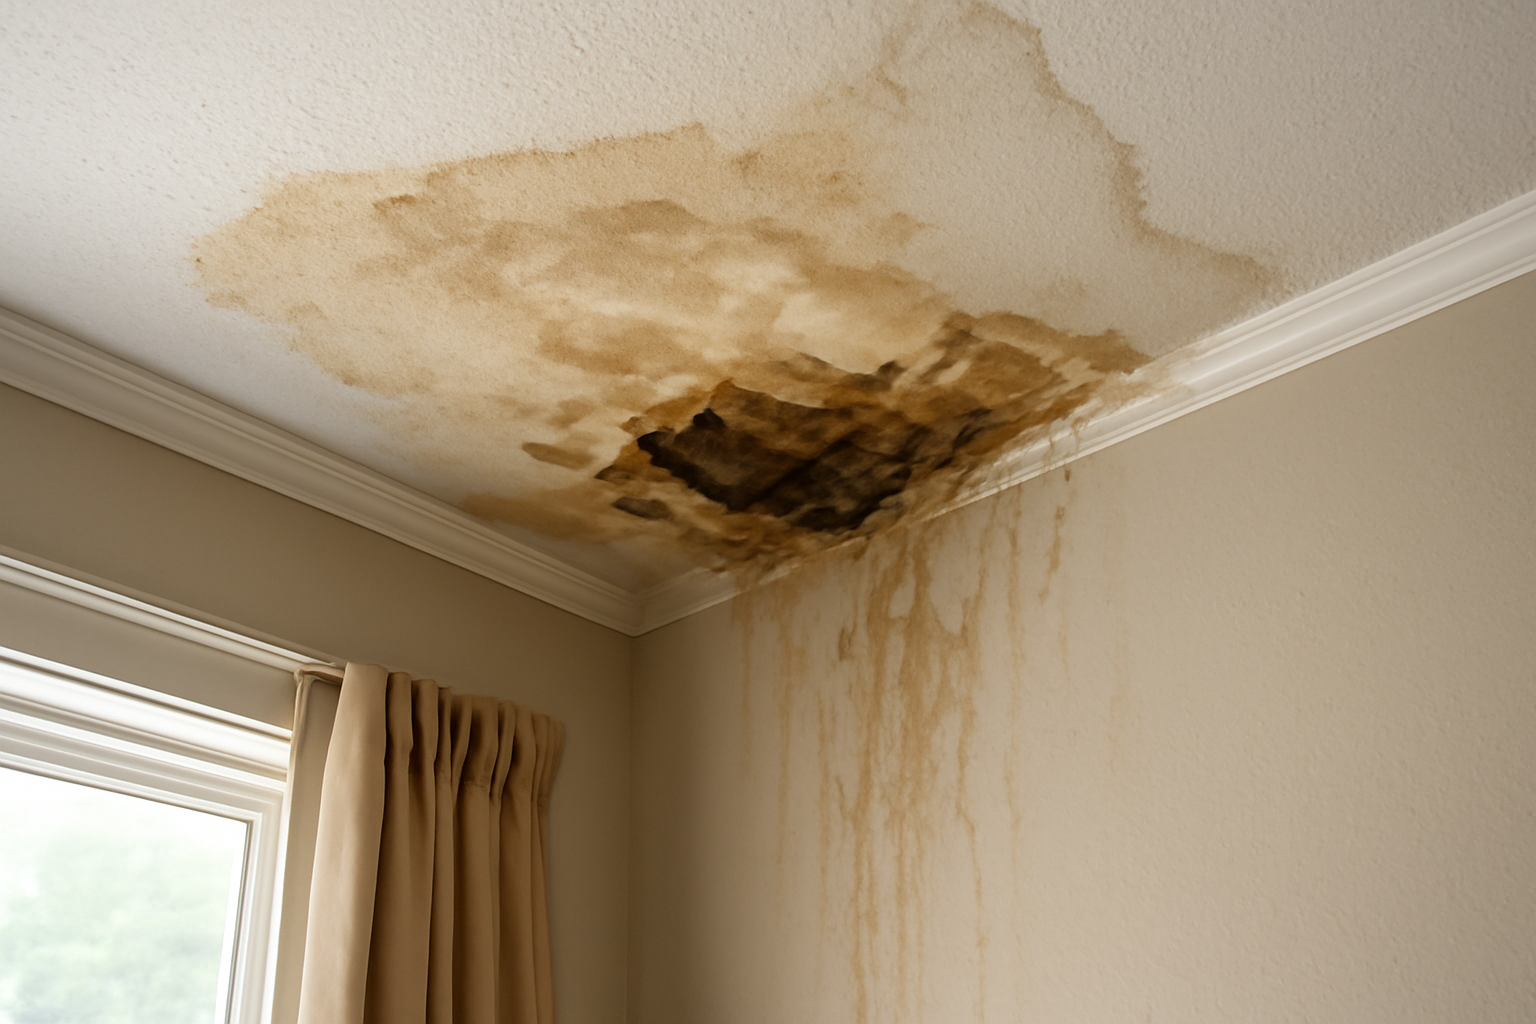
When Water Woes Hit Your Ceiling in Watkinsville, GA
Here in Watkinsville, GA, we know all about those sudden, heavy summer downpours. Sometimes, they don’t just stay outside. They find their way in, often through tiny cracks or failing seals, leading to that dreaded sight: a water-stained, sagging ceiling. It’s a problem that can escalate quickly, turning a minor leak into a significant headache for your home. Dealing with this kind of damage requires a specific, focused approach, and we’re here to help you navigate it. Protecting your home is always our top priority.
We’ve helped hundreds of your neighbors across the area tackle this very issue, and they’ve consistently chosen us for our focused expertise. With over 165 five-star reviews, you can see how much homeowners value our dedicated service for ceiling drywall water damage. We understand the stress it causes, and we’re committed to providing a clear, efficient path back to a dry, secure home. Trustworthy local service makes all the difference.
- We specialize in the precise techniques needed to dry out and repair water-damaged ceiling drywall, preventing mold growth and structural issues.
- Our team uses advanced moisture meters and drying equipment to ensure your ceiling is completely dry, not just on the surface.
- We handle everything from the initial assessment and water extraction to drywall repair, priming, and painting, restoring your ceiling’s appearance.
How Ceiling Drywall Water Damage Restoration Actually Works
When water finds its way into your ceiling drywall, it doesn’t just sit there. It saturates the material, weakens its structure, and can create a breeding ground for mold if not addressed properly and quickly. That’s why having a clear, methodical restoration process is so important. Cutting corners here can lead to recurring problems, hidden mold, and even more costly repairs down the line. Our approach is designed to be thorough and effective, focusing solely on resolving your ceiling water damage. A proper repair matters for long-term protection.
Step 1: Initial Assessment and Water Source Identification
The very first thing we do is figure out exactly where the water is coming from. Is it a leaky roof, a faulty pipe in the attic, or maybe an overflowing upstairs bathroom? Identifying the source is crucial to prevent the problem from happening again. We’ll use specialized tools to pinpoint the origin and assess the extent of the damage to your ceiling drywall.
Step 2: Water Extraction and Containment
Once we know the source is stopped, we move to remove any standing water. For ceiling issues, this might involve carefully puncturing the drywall to allow trapped water to drain safely away, preventing further saturation and collapse. We’ll use powerful pumps and vacuums to extract as much moisture as possible. Efficient water removal is key to limiting damage. This step typically takes a few hours, depending on the amount of water.
Step 3: Drying and Dehumidification
This is where the real magic happens. We bring in specialized drying equipment like air movers and industrial dehumidifiers. These machines work tirelessly to pull moisture out of the air and from within the drywall and any affected insulation. Thorough drying is essential to prevent mold and preserve the integrity of your ceiling. This phase can take anywhere from 24 hours to several days, depending on the severity of the saturation and the building materials.
Step 4: Mold Prevention and Treatment
Even after drying, there’s always a risk of mold developing in damp environments. We’ll carefully inspect for any signs of mold growth and treat affected areas with antimicrobial solutions if necessary. Preventing mold growth is a non-negotiable part of the process, ensuring a healthy living environment for you and your family. This is usually done towards the end of the drying phase.
Step 5: Drywall Repair and Finishing
Once everything is confirmed dry and mold-free, we move on to the repairs. This involves cutting out any severely damaged sections of drywall, replacing them with new material, and then texturing and painting to match your existing ceiling. Restoring your ceiling’s appearance is the final step, making it look like the damage never even happened. This final stage usually takes 1-3 days, depending on the size of the area needing repair.
Don’t let a leaky ceiling ruin your home’s integrity or your comfort. Take action today to address ceiling water damage effectively.
Warning Signs You Need Ceiling Drywall Water Damage Restoration
Catching water damage early can save you a lot of money and a lot of hassle. Your ceiling might be trying to tell you something, and it’s important to listen. Ignoring these signs can lead to much bigger, more expensive problems down the road, like extensive mold growth or structural damage. Early detection is your best defense against costly repairs.
Musty Odors That Won’t Go Away
If you notice a persistent damp, musty smell, especially after rain or if you have an upstairs plumbing issue, it’s a strong indicator of moisture trapped somewhere. Investigate strange smells; they often point to hidden water damage.
Visible Water Stains or Discoloration
The classic brown or yellow rings on your ceiling are obvious signs of water intrusion. Even if the leak has stopped, the stain means the drywall has been saturated. Address stained ceilings promptly before they weaken further.
Sagging or Bubbling Drywall
When drywall gets wet, it loses its rigidity. A section of your ceiling that appears to be drooping or has a bubble-like appearance is a clear sign it’s holding a significant amount of water. Watch for sagging drywall; it’s a critical warning sign of imminent failure.
Peeling Paint or Wallpaper
Moisture can break down the adhesive holding paint and wallpaper to the drywall. If you see sections of your ceiling’s finish starting to peel or bubble, it’s likely due to water getting behind it. Check for peeling finishes as an early indicator of moisture.
Cracks or Holes in the Ceiling
While some cracks can be cosmetic, new or widening cracks, especially around light fixtures or vents, could indicate that water saturation is weakening the drywall structure. Inspect for new cracks that appear suddenly.
Ceiling Drywall Water Damage Restoration vs. DIY: When To Call a Professional
| Situation | DIY? | Call a Pro? | Why |
|---|---|---|---|
| Small, fresh water spot from a recent, obvious leak (e.g., a knocked-over plant) | Yes, for minor drying and patching | Maybe, if unsure about complete drying | Ensuring the area is fully dry prevents hidden mold. |
| Large, spreading water stain on the ceiling | No | Yes | Extensive saturation requires professional drying equipment and expertise. |
| Ceiling drywall is visibly sagging or bulging | Absolutely Not | Yes | This indicates structural compromise; professional intervention is required for safety. |
| Suspected mold growth around the water stain | No | Yes | Mold remediation requires specialized knowledge and safety protocols. |
| Water source is unknown or recurring | No | Yes | Professionals can identify and address the root cause of the leak. |
| Water has been present for more than 24-48 hours | No | Yes | Prolonged moisture significantly increases the risk of mold and structural damage. |
While minor drips might seem manageable with DIY efforts, any significant water intrusion into your ceiling drywall warrants professional attention. Professional assessment ensures all hidden moisture is found and removed, protecting your home from future issues.
Ceiling Drywall Water Damage Restoration Cost In Watkinsville, GA
The cost for ceiling drywall water damage restoration in Watkinsville, GA, can vary quite a bit. It really depends on how much of the ceiling is affected, how long the water was there, and the complexity of the repair needed. These prices are just general estimates to give you an idea. Understanding restoration costs helps you budget for repairs.
| Service | Typical Price Range | What Affects Cost |
|---|---|---|
| Water Damage Assessment & Moisture Mapping | $250 – $750 | Size of affected area, use of advanced scanning tools. |
| Water Extraction (for ceiling leaks) | $500 – $1,500 | Volume of water, accessibility of the ceiling area. |
| Structural Drying & Dehumidification | $700 – $3,000+ | Duration of drying needed, number of machines used, size of room. |
| Mold Prevention/Treatment | $300 – $1,000+ | Extent of potential mold, type of treatment required. |
| Drywall Repair & Patching | $400 – $1,200 | Size of the damaged section, complexity of the repair. |
| Priming & Painting | $300 – $800 | Size of the area painted, type of paint needed. |
These figures are estimates and a precise quote will always require an on-site evaluation. We offer free estimates so you know exactly what to expect before we begin.
Service Areas Near Watkinsville, GA
Athens, Bogart, Bishop, Comer, Danielsville, Jefferson, Hull, Lexington, Madison, Nicholson, Oconee, Pendergrass, Statham, Talmo, Union Point, Watkinsville, Winder, Winterville, Greensboro, Monticello.
Common Questions About Ceiling Drywall Water Damage Restoration
What’s the first thing I should do if I see water damage on my ceiling?
The absolute first step is to try and stop the water source if you can safely do so. If it’s a visible leak from an appliance or pipe, turn it off. If it’s from the roof, you’ll need to call a roofer. Then, place buckets to catch any drips and call us immediately. Prompt action minimizes damage and our team is ready to respond quickly.
How long does it typically take to repair water damage on a ceiling?
The timeline really depends on how much water is involved and how long it’s been there. The drying process itself can take anywhere from 24 hours to several days, followed by the repair and finishing work. We work efficiently to restore your ceiling as quickly as possible while ensuring a thorough job.
Is it safe to be in a room with a water-damaged ceiling?
It can be unsafe, especially if the drywall is visibly sagging. It could collapse, and there’s also the risk of mold growth, which can affect air quality. Your safety is paramount, so we recommend staying clear of the affected area until our technicians have assessed and begun the restoration process.
What kind of equipment do you use to dry out a wet ceiling?
We use professional-grade equipment such as high-powered air movers to circulate air, industrial dehumidifiers to remove moisture from the air, and specialized moisture meters to ensure all hidden dampness is detected and removed. Advanced drying technology is key to a complete restoration.
How can I prevent water damage to my ceiling in the future?
Regular maintenance is key. This includes inspecting your roof for damage, ensuring gutters are clear, checking plumbing in attics or upper floors for leaks, and making sure seals around vents and chimneys are intact. Proactive home maintenance can prevent many water damage issues before they start.
Check Our Other Relevant Services

Jerry Johns is a licensed Damage Restoration Expert with over 20 years of hands-on experience helping homeowners and businesses navigate property crises. As a trusted authority in the field, Jerry combines technical precision with a compassionate approach to disaster recovery.
𝗖𝗲𝗿𝘁𝗶𝗳𝗶𝗰𝗮𝘁𝗶𝗼𝗻𝘀: Jerry holds multiple elite IICRC certifications, including Water Damage Restoration (WRT), Applied Microbial Remediation (Mold), Applied Structural Drying (ASD), Odor Control, and Fire and Smoke Restoration.
𝗙𝗮𝘃𝗼𝗿𝗶𝘁𝗲 𝗣𝗮𝘀𝘁𝗶𝗺𝗲: When he isn’t on a job site, Jerry is an avid outdoorsman who enjoys fly fishing and restoring vintage woodworking tools.
𝗕𝗲𝘀𝘁 𝗣𝗮𝗿𝘁 𝗼𝗳 𝘁𝗵𝗲 𝗝𝗼𝗯: Jerry finds the most fulfillment in seeing the relief on a client’s face when their property is finally restored to its pre-loss condition, turning a stressful disaster into a fresh start.


